

Jan
11
2024


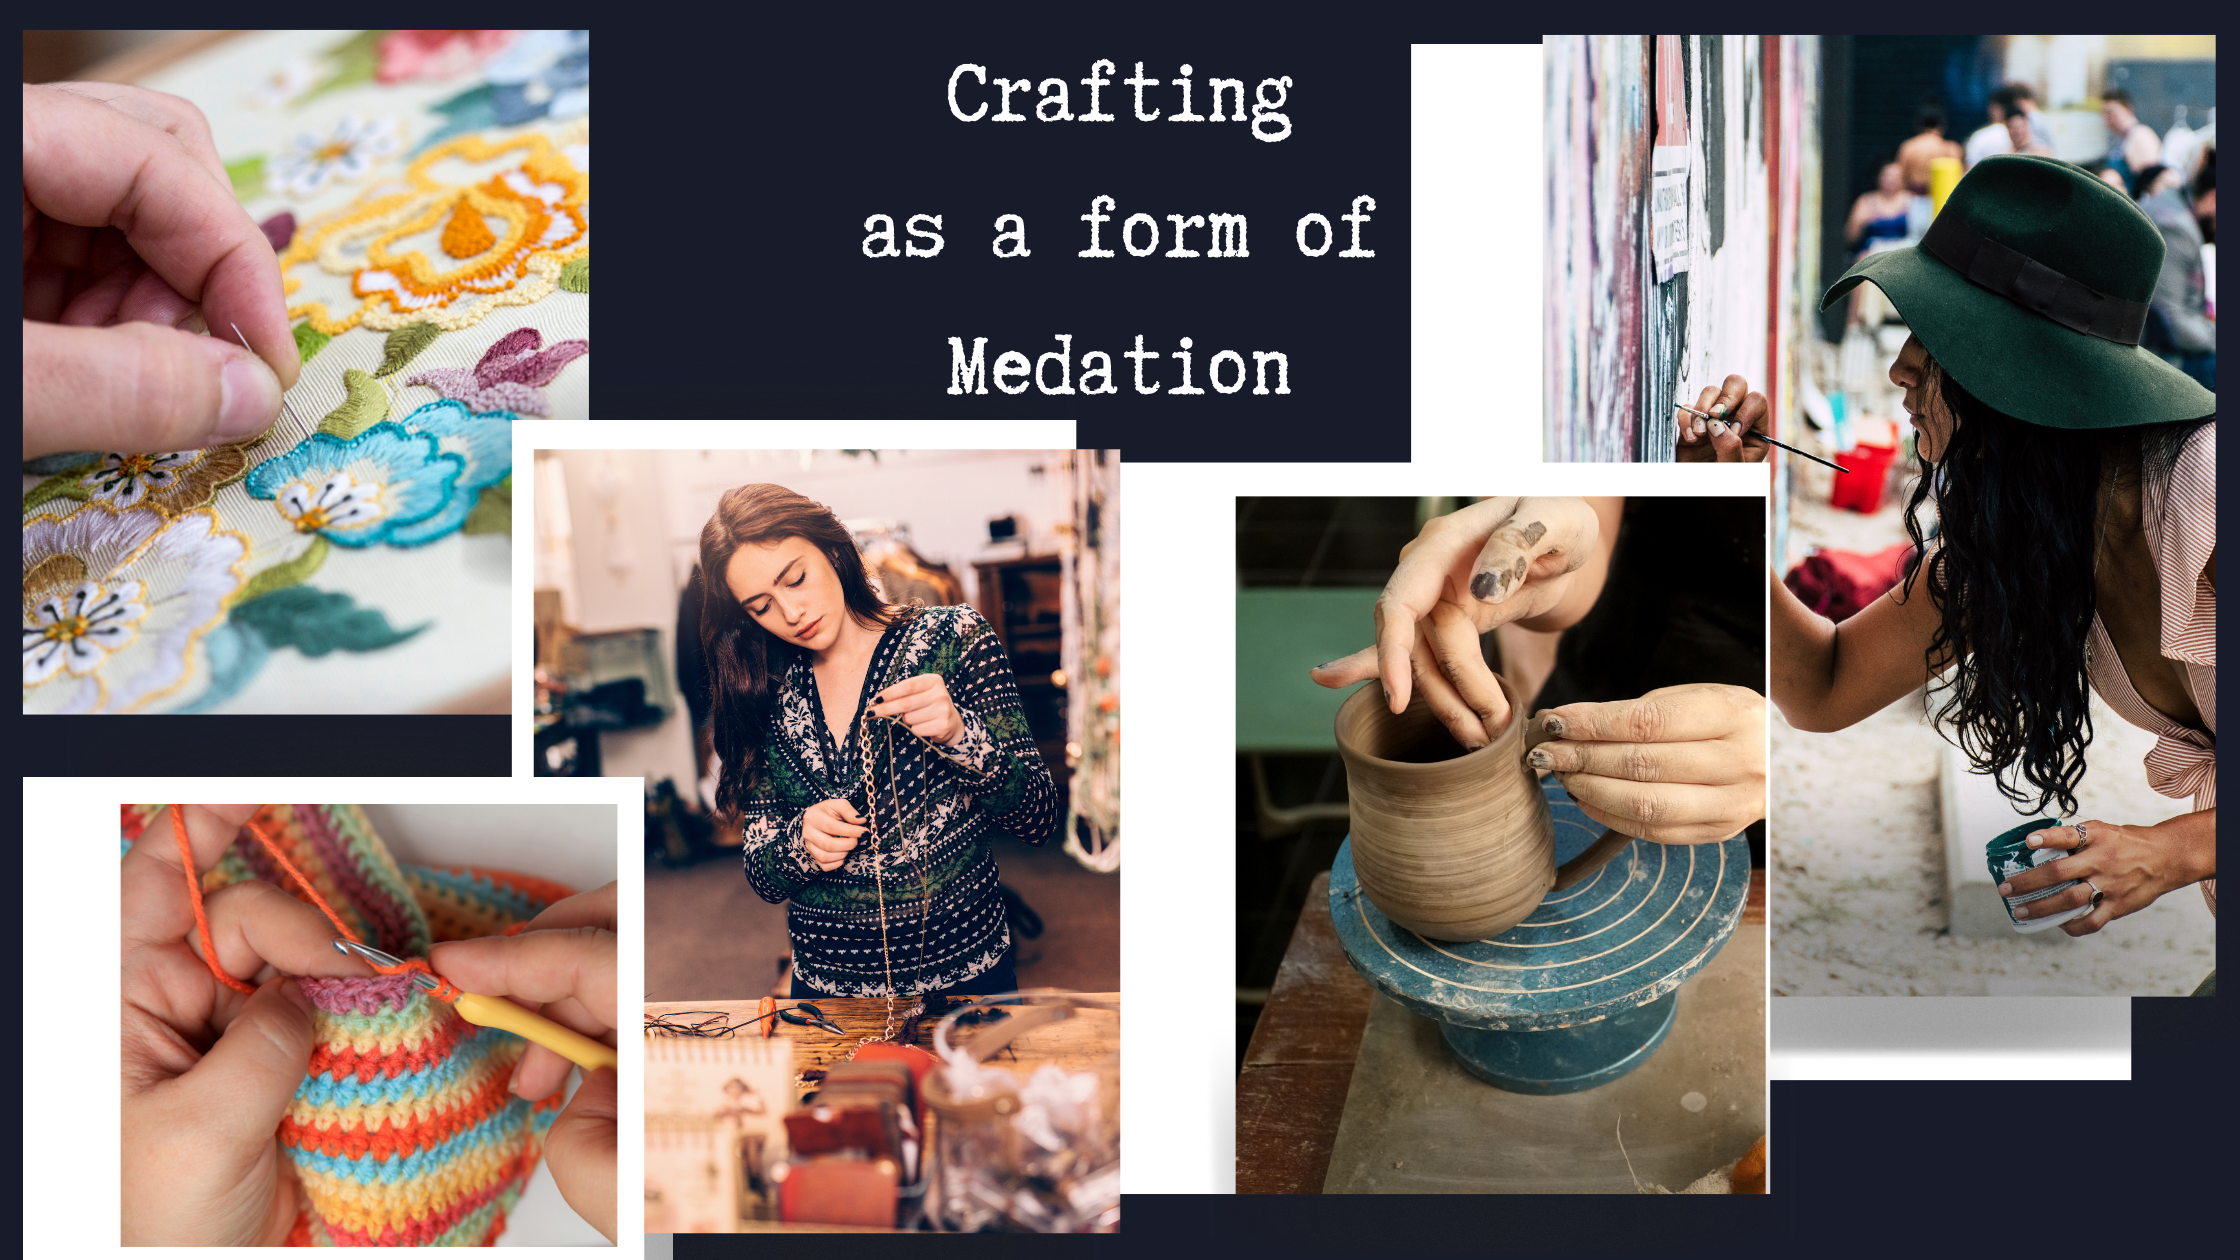
In the hustle and bustle of our fast-paced lives, finding moments of tranquility and peace is essential for maintaining mental well-being. While meditation is a widely embraced practice, there exists a lesser-known avenue for achieving mindfulness – crafting. Engaging in creative activities can be a powerful form of meditation, offering a therapeutic escape from the stresses of daily life. Let's delve into the world of crafting and explore how it serves as a conduit for inner calm and self-discovery. Crafting is more than just a pastime; it is a process that demands focus, patience, and attention to detail. When we immerse ourselves in a creative endeavor, whether it's knitting, painting, or sculpting, our minds naturally enter a state of mindfulness. The repetitive motions and the tactile experience of working with materials provide a sensory-rich environment that helps anchor our thoughts to the present moment. In the hustle and bustle of our fast-paced lives, finding moments of tranquility and peace is essential for maintaining mental well-being. While meditation is a widely embraced practice, there exists a lesser-known avenue for achieving mindfulness – crafting. Engaging in creative activities can be a powerful form of meditation, offering a therapeutic escape from the stresses of daily life. Let's delve into the world of crafting and explore how it serves as a conduit for inner calm and self-discovery. Crafting is more than just a pastime; it is a process that demands focus, patience, and attention to detail. When we immerse ourselves in a creative endeavor, whether it's knitting, painting, or sculpting, our minds naturally enter a state of mindfulness. The repetitive motions and the tactile experience of working with materials provide a sensory-rich environment that helps anchor our thoughts to the present moment. Focus on the Present: Crafting requires concentration on the task at hand, diverting attention away from the chaos of daily life. Whether you're meticulously knitting a scarf or intricately painting on canvas, the act of creation pulls you into the present, allowing you to let go of worries about the past or future. Stress Reduction: Engaging in creative activities has been linked to reduced levels of stress and anxiety. The rhythmic, purposeful movements involved in crafting promote relaxation and can lower cortisol levels. As stress melts away, a sense of calmness takes its place. Mind-Body Connection: Crafting involves a deep connection between the mind and the body. As you manipulate materials, your hands and mind work in harmony, fostering a holistic sense of well-being. This mind-body connection is a cornerstone of meditative practices. Expressive Outlet: Crafting provides a means of self-expression. Whether consciously or subconsciously, the choices you make in your creative process can reflect your emotions, thoughts, and even your state of mind. This expressive outlet can be a valuable tool for self-discovery and introspection. Sense of Accomplishment: Completing a crafting project, no matter how simple or complex, brings a sense of achievement. This positive reinforcement can boost self-esteem and contribute to an overall sense of well-being. To fully reap the meditative benefits of crafting, consider integrating creative activities into...
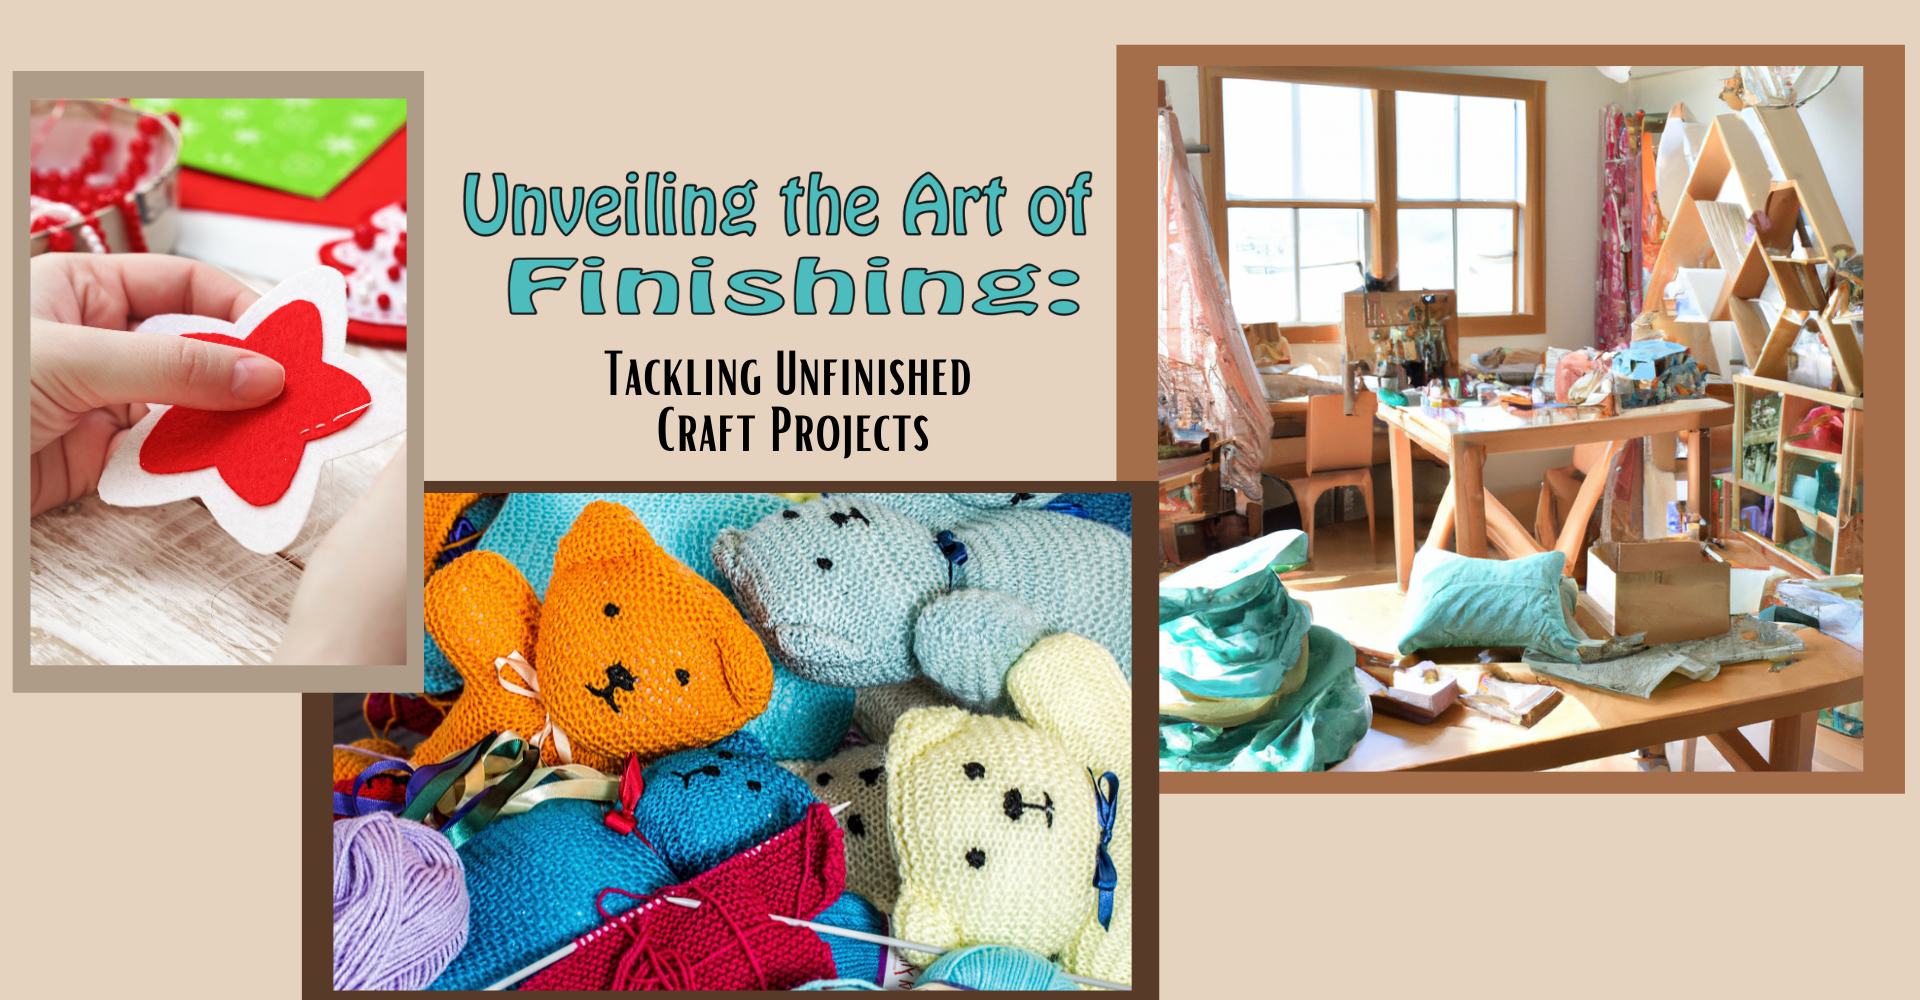
Have you ever found yourself surrounded by a mountain of half-completed craft projects, each one whispering promises of creative fulfillment and accomplishment? You're not alone! The journey of turning unfinished projects into completed masterpieces can be both challenging and incredibly rewarding. Let's embark together on the path of reclaiming your crafting haven and transforming it into a gallery of completed wonders. 1. The Power of Reflection: Begin by taking a moment to reflect on each project. What inspired you to start them in the first place? Identify the reasons behind their incomplete status and envision the satisfaction of completing each one. This self-awareness will be your guiding light. 2. Prioritize and Organize: Create a realistic roadmap by prioritizing your projects. Consider factors like deadlines, personal attachment, or the feasibility of completing them. Once you've established priorities, organize your workspace, gathering all necessary materials for each project. A well-organized space can do wonders for your motivation. 3. Break it Down: Large, looming projects can be intimidating. Break them down into smaller, more manageable tasks. Set achievable milestones, and celebrate each small victory. This not only makes the process less overwhelming but also provides a continuous sense of accomplishment. 4. Set Realistic Deadlines: Time management is key. Assign realistic deadlines for completing each project, and stick to them as closely as possible. Having a tangible timeframe can instill a sense of urgency and dedication, turning procrastination into productivity. 5. Accountability Partners: Share your crafting goals with a friend, family member, or fellow crafter. Having someone to cheer you on and hold you accountable can be a powerful motivator. Consider setting up regular check-ins to discuss progress and share your victories. 6. Embrace the Imperfections: Crafting is a journey, and sometimes projects don't turn out exactly as planned. Embrace the imperfections, learn from them, and remember that the joy is in the process as much as the outcome. Perfection is overrated; authenticity is priceless. 7. Rediscover the Joy: Reignite the passion that sparked each project. Rediscover the joy and enthusiasm that initially fueled your creative endeavors. Whether it's the love of a particular craft or the desire to gift your creations, reconnect with the core motivation behind each project. Completing your pile of unfinished craft projects is not just about decluttering your space; it's about rediscovering the joy of creating and bringing your artistic visions to life. Embrace the journey, savor the process, and revel in the satisfaction of turning each unfinished project into a triumph of creativity. Your crafting haven awaits, ready to showcase the fruits of your dedication and perseverance. Happy crafting! ...

I have trying to practice mindful eating (low carbos). However, indulging in the simple pleasure of toasted bread is a joy that many can relate to. What makes it even better? Smearing it with a sinful combination of unsalted butter, garlic, and Italian herbs. Today, I'm excited to share a delightful recipe that I stumbled upon in my quest for the perfect toast. Brace yourself for an explosion of flavors as we create the irresistibly delicious Garlic Butter Herb Toast! Ingredients: 1/2 cup unsalted butter, softened (1 stick of butter) 2 tsp minced garlic 1 tbsp dried Italian herbs 1 loaf of Italian bread Instructions: Preheat the Oven: Begin by preheating your oven to 350 degrees, setting the stage for the aromatic symphony that is about to unfold. Prepare the Butter Mixture: In a small bowl, combine the softened butter, minced garlic, and dried Italian herbs. Mash the ingredients together until a harmonious blend is achieved. Slice the Italian Bread: Take the loaf of Italian bread and carefully slice it lengthwise, creating the canvas for our flavorful masterpiece. Spread the Butter Mixture: Evenly spread the luscious butter mixture over both halves of the sliced bread. This step is where the magic happens, as each layer gets coated with the richness of butter, the kick of garlic, and the essence of Italian herbs. Bake to Perfection: Place the buttered bread on a cookie sheet and let it bake in the preheated oven for 10 to 15 minutes. This short stint in the heat will transform the ingredients into a golden symphony of taste and texture. Adjusting the Flavors: The result is a buttery delight, but if you find the herbs a bit overwhelming, consider adjusting the recipe. I recommend reducing the amount of dried Italian herbs to half a tablespoon and increasing the garlic for a more personalized flavor profile. The aroma wafting from your kitchen as this Garlic Butter Herb Toast bakes is enough to make your taste buds dance with anticipation. Perfect for a lazy brunch or as an accompaniment to your favorite pasta dish, this recipe is a testament to the simple joys of savoring life, one delicious bite at a time. So, go ahead, embrace the decadence, and treat yourself to a slice of pure indulgence! ...
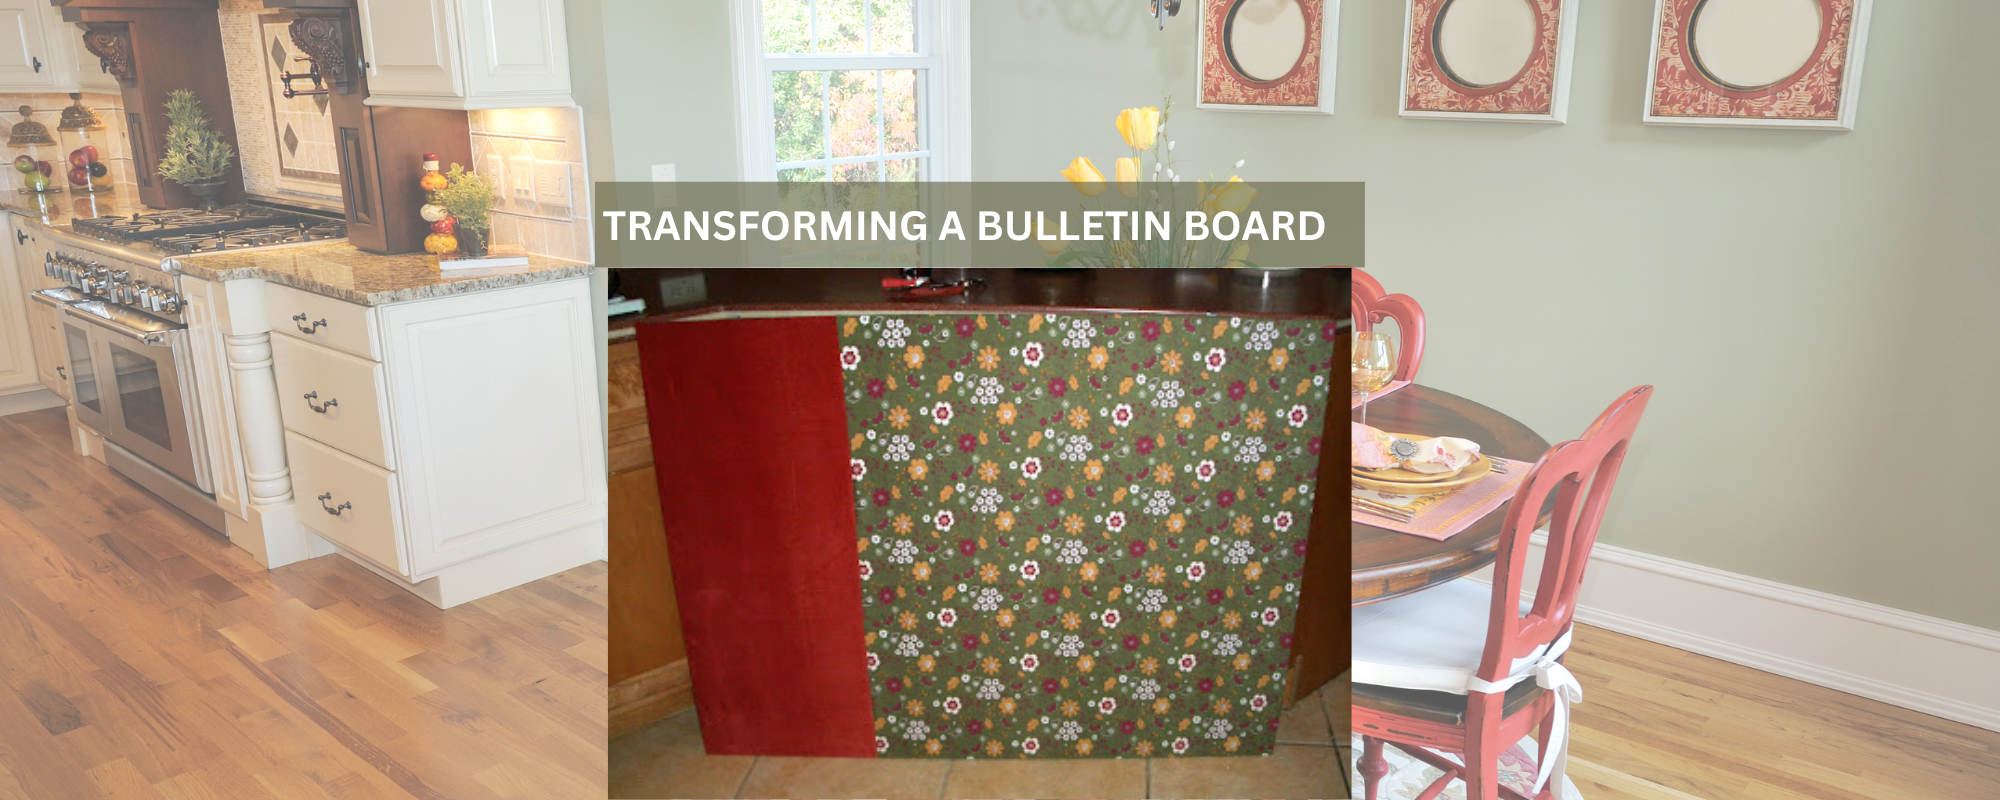
Building a home workspace can be both exciting and challenging, especially when your workspace is nestled in unconventional corners. My journey led me to repurpose an unlikely find – a bulletin board my husband brought home from a closing PetSmart. With a vision to turn it into a functional and aesthetically pleasing addition to my work nook, I embarked on a DIY adventure. The bulletin board, while practical, didn't exactly match the vibe of my workspace. However, armed with creativity and a desire for a personalized touch, I decided to transform it into something special. I gathered my supplies from what I already had available. Materials Needed: Bulletin board (48" x 36") 1 yard of patterned fabric 16" of solid fabric Scissors Push pins Tape measure Staples Stapler Iron Let's get started. 1. Planning and Preparation: Before diving into the project, I carefully assessed the dimensions of the bulletin board and calculated the fabric needed. With 1 yard of patterned fabric and 16" of a solid color, I was ready to breathe new life into this utilitarian piece. 2. Fabric Assembly: After ironing the fabric to ensure a smooth finish, I pinned the two pieces together with the wrong sides facing. A simple seam with a 1/2-inch allowance secured the fabrics, creating a seamless backdrop for my bulletin board. 3. Wrapping the Board: With the fabric ready, I wrapped it around the bulletin board, using push pins to hold it securely in place. The key here was to ensure a taut fit. The combination of patterned and solid fabrics added a visually appealing dimension. 4. Stapling Magic: Armed with a trusty stapler, I began securing the fabric to the board. Starting from one end, I pulled the fabric tight and stapled along the edges. The corners proved a bit tricky, but I employed a wrapping technique – similar to wrapping a present – to achieve neat, folded edges. 5. Inspection and Admiration: Once all the fabric was securely fastened, I turned the bulletin board around to inspect my handiwork. The result? I fell in love with the transformation. The bulletin board had evolved from a mundane piece to a personalized, vibrant addition to my workspace. The only task left was to convince my husband to assist me in hanging up my newly upgraded bulletin board. With its newfound charm, it became more than just a practical accessory – it became a statement piece, embodying the fusion of creativity and functionality in my home workspace. ...